
The Social Work department has put together two carts to support hybrid learning. These carts are available in CN 201, and should be reserved in advance. Please follow the instructions below to get set up (it’s easier than it looks!), and keep reading for more tips and tricks for supporting your technology needs.
- Pick up the cart at the Welcome Desk. You can reserve in advance by physically signing it out at the Welcome Desk or by emailing the Welcome Desk. You can take your chances and see if one is available when you need it as well.
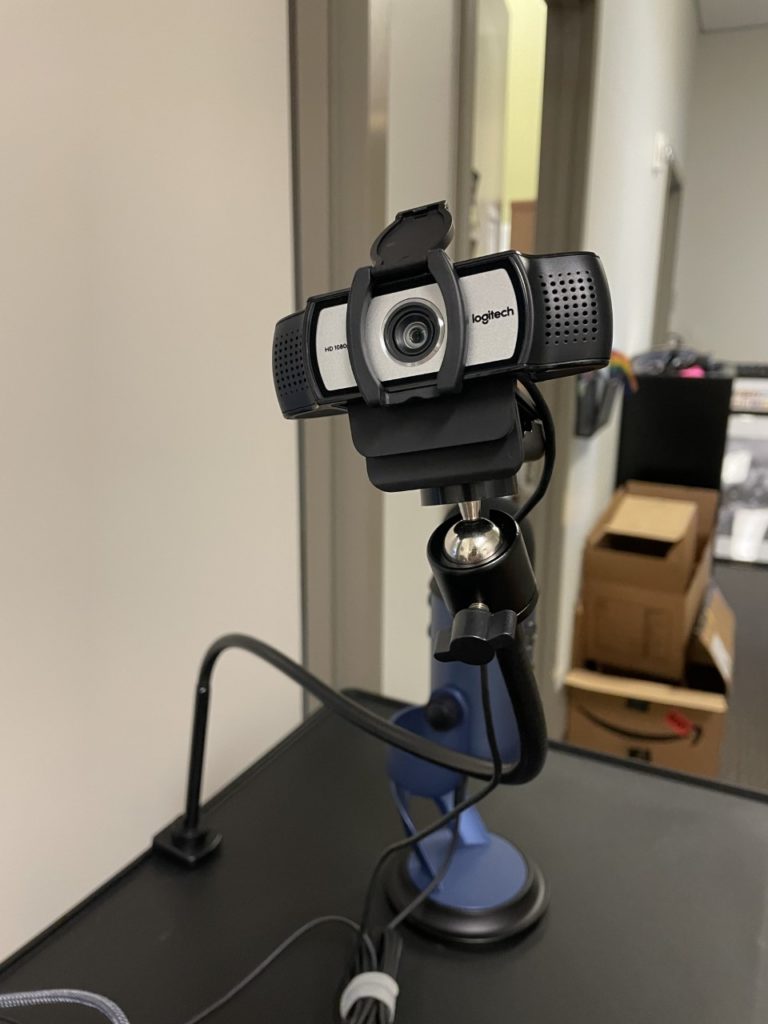
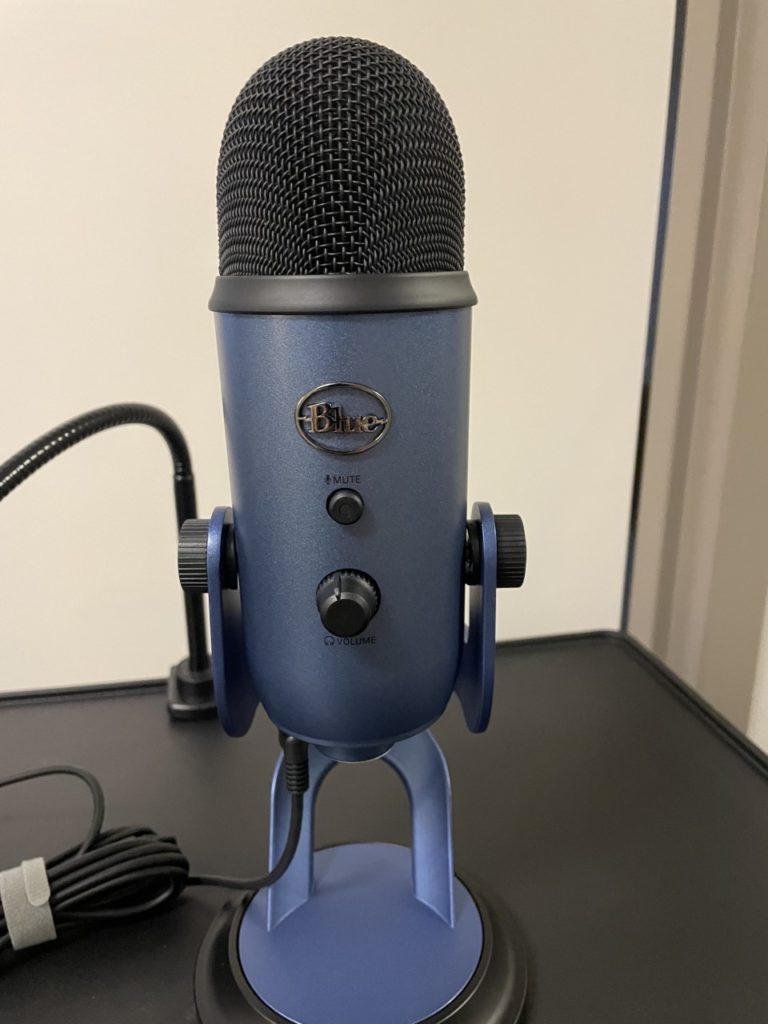
- Make sure the cart has all components when you check it out (Yeti Mic, Logitech Camera, Camera Gooseneck Stand, USB connector, Instructions, 1 silver cord extension)
- Bring cart to classroom.
- Position the cart towards the center of the room. Have the camera focused on the front of the room for lecture or turn towards the class for discussion. You can move this around if something changes. It is recommended that you just keep it focused forward. Keep the mic on the cart as well or you can move it to the center of the room, however, it must remain plugged into the USB connector on the cart. Students on Zoom will be able to “hear” their colleagues, and this is essential over seeing them.
- Check to make sure all “connections” are secure . . . meaning . . . make sure everything is plugged in on the cart to the USB connector. Everything should already be connected- this is just a double check!
- Power DOES NOT need to be plugged in from the cart. All power comes from the USB connection.
- Plug the USB extension cord into your laptop or the classroom computer. For the classroom computer, the USB port is on the side of the monitor.
- Internet: If you are using your laptop, you may want to hardwire into the internet incase your wifi drops with the Zooming/Teamsing. Classroom computers are already connected.
- If you want to display the remote participants on your main classroom screen and/or share your Power Point, make sure that you connect your laptop to the room’s projector through the HDMI or VGA adaptor. If using the classroom computer, it should display automatically. If you have a VGA port and using an adaptor (or dongle) make sure your sound is plugged in as well. It is usually a head phone jack that is plugged directly into your computer or the dongle/adapter.
- Open Zoom/Teams
- You will need to make sure your camera and microphone and speaker are selected in the program you choose. You may get lucky and it will automatically WORK! If Yes (go buy a lottery ticket). If not: proceed to step 12.
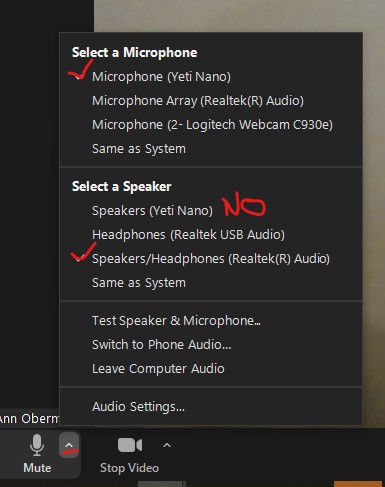
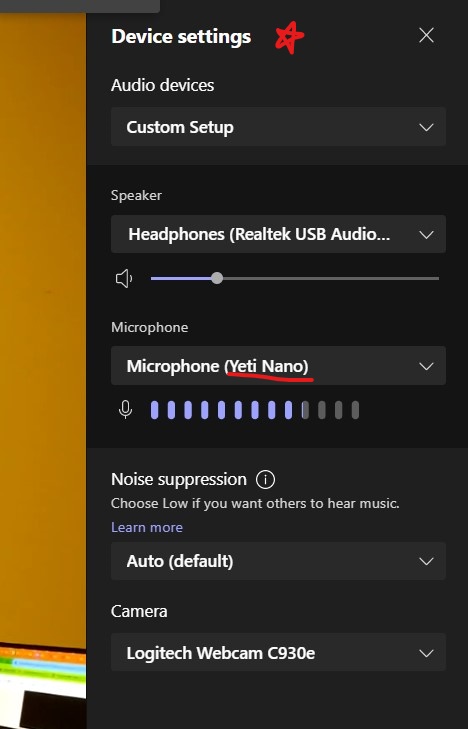
- Check the “camera”, “speaker”, and “microphone” settings to make sure you have selected the tech cart items. Your computer may default to other options. Make sure it is selected for Camera: Logitech; Speaker: Room (this may have a different name (maybe HDMI something), but it is not your computer or the Yeti; Microphone: Yeti). To check this you need to go to the “device setting” in Zoom/Teams. Below are screen shots for Canvas and Teams to manage your device settings. You may need to play with the “speaker” settings to select the correct one. When using the Yeti microphone, it often defaults to this as the speaker too. The speaker does not work with the Yeti, so you need to select a different speaker.
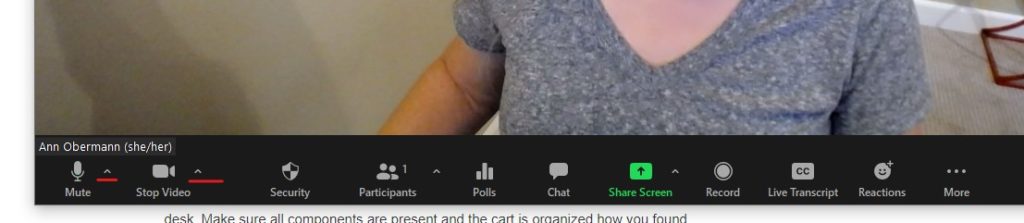
- Ask your students on Zoom/Teams if they are able to hear you and have them speak to test if you can hear them. You can also “test” these items by seeing if they register on the speaker/microphone gauge in purple or green.
- If you need to record your session, please do so now.
- Turn on “live transcript” in Zoom under CC and in Teams under Device Settings (Turn on Live Captions)
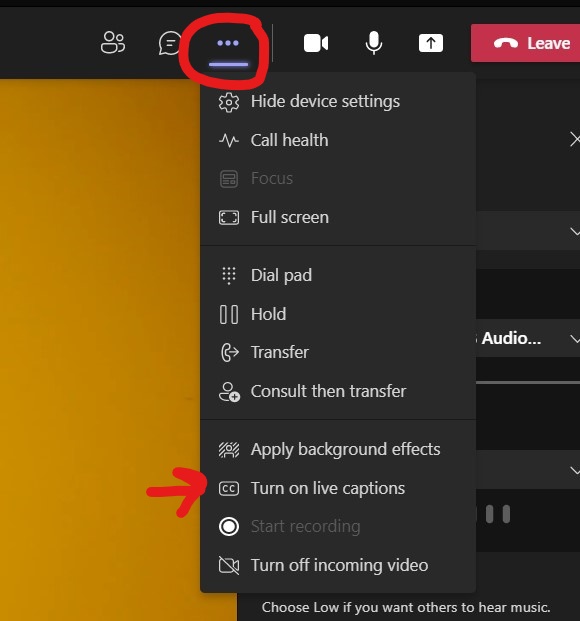

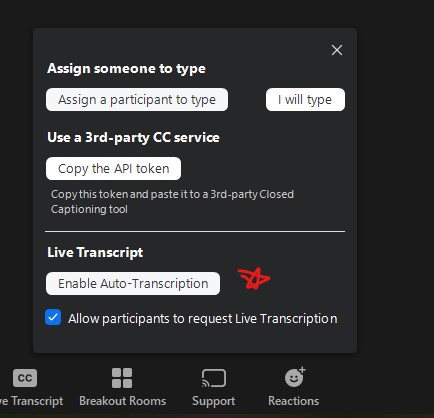
Zoom may require you to update your settings and/or enable Live Transcript so go here for instructions: https://support.zoom.us/hc/en-us/articles/207279736-Closed-captioning-and-live-transcription
- When finished with cart, please return the cart to CN 201 and check it in with the front desk. Make sure all components are present and the cart is organized how you found it. If you are returning after 5pm, please stick it down the hall past the welcome desk.
- YOU WERE SUCCESSFUL! Nice work!
Problem Solving
- Sound doesn’t work: Check to see that you are “plugged” into the rooms sound through the HDMI port that connects to the rooms sound and digital projector. If there is no HDMI cord, you may need to use an adaptor for the VGA cord and then also plug in the headphone jack into your computer or the adaptor. This will connect you to the “room” sound. After connecting, the “speaker” setting will need to be tested. In Zoom, this is the green microphone in the bottom left corner. Click on the drop down and make sure to select the correct speaker. Do NOT select the Yeti for the speaker as it serves as a Microphone.
- Yeti Microphone: it may mute so check the actual microphone: the light flashes if it is on mute, it is solid if recording (red light). Microphone is supposed to stand straight up, it picks up sound from all around.
IT Classroom Support
It is available to support any classroom need you have with regard to playing videos, sound issues, and more. Please view the tech cart video and these instructions before you call IT as you may be able to solve your own problem. Students are also a big help. Otherwise call IT, they are magic. 303-352-7548
Classroom Considerations
- No classroom computer: You will need to use your own laptop. If you are sharing your screen, make sure you are closed out of all other “programs” or “windows”.
- No HDMI cords: Some rooms do not have classroom computers and still have VGA cords/ports to connect with the classroom projector. Make sure to check into this and come prepared.
- CN 201 SW Welcome Desk has some dongles/adaptors to check out, but please try and have your own to make sure you always have access.
- Position of cart for visibility and sound.
- Cords: be careful if you have cords on the floor. Make students aware and yourself so no one trips.
Hybrid Meeting/Teaching Tips
- Repeat audience questions
- Ask online participants if they can “hear” at the beginning and periodically
- Assign someone in the room to manage the chat and interrupt the instructor as needed. They can log into the zoom room on their computer and MUTE all sound. They can participate in the chat and help the instructor stay connected with questions and online activity.
- Toggle between sharing screen and seeing online participants. When you are discussing, have screen share off so online participants appear big.
- Breakout rooms: When doing classroom activities, put the online folks together in a breakout room so they do not hear all the classroom noise.
- Stop frequently and engage with the online participants.